Arkanoid
Introduction
Arkanoid (or Breakout as it is often known) is a natural progression in terms of development from Pong. It shares several features that we have already tackled, such as the paddle movement, the ball bouncing off walls and colliding with paddles, as well as reacting to the ball falling out of the screen area. However it requires enough new features to represent a step up in development complexity. In this tutorial, we'll look into representing objects as Lua tables (a step towards an object-oriented approach), splitting our code across multiple files to aid mantainability and clarity, more advanced collision detection & resolution logic, and much more!
Setup
As before, begin by creating a new folder, and in it create a main.lua file. Add necessary built-in LÖVE functions that we'll be using:
function love.load()

end

function love.update(dt)

end

function love.draw()

end

function love.keypressed(key)
    if key == 'escape' then
        love.event.quit()
    end
end
Verify this works my navigating to the directory in your terminal/IDE and running love .. You should see a black untitled screen.
Creating the paddle
As discussed in the introduction, we are going to move towards representing objects in our game as Lua tables. If you're familiar with other programming languages, Lua tables behave in very much the same way as a Dictionary in C# or Python, a Map in Java/C++/C, a Hash in Ruby or an Object in JavaScript.
First of all, we will create an empty table representing the paddle (at the top of the file, outside of love.load):
paddle = {}Then assign the required properties. In love.load add the following:
paddle.w = 100
paddle.h = 10
paddle.y = love.graphics.getHeight() - 100
paddle.x = love.graphics.getWidth() / 2 - paddle.w / 2
paddle.speed = 400
Next, we will add the logic to update and draw our paddle, in love.update and love.draw respectively. This is very similar to the equivilent functions in our previous tutorial, so I won't go into detail. We will also make use of the math.clamp function we wrote last time.
function love.update(dt)
    local dx = 0
    if love.keyboard.isDown('a') then
        dx = dx - 1
    end
    if love.keyboard.isDown('d') then
        dx = dx + 1
    end
    paddle.x = paddle.x + dx * paddle.speed * dt
    paddle.x = math.clamp(paddle.x, 0, love.graphics.getWidth() - paddle.w)
end

function love.draw()
    love.graphics.rectangle('fill', paddle.x, paddle.y, paddle.w, paddle.h)
end

function math.clamp(value, min, max)
    return math.max(math.min(value, max), min)
end
While the above code works perfectly fine, our love.update and love.draw functions will soon become much larger as we add more and more objects to our game.
Tables, as well as holding variables as values, can also hold functions. So, let's tidy up our code by extracting the logic for updating and drawing the paddle into functions, and assigning those functions to key's in the paddle table. We can then call those functions in love.update and love.draw.
function paddle.update(dt)
    local dx = 0
    if love.keyboard.isDown('a') then
        dx = dx - 1
    end
    if love.keyboard.isDown('d') then
        dx = dx + 1
    end
    paddle.x = paddle.x + dx * paddle.speed * dt
    paddle.x = math.clamp(paddle.x, 0, love.graphics.getWidth() - paddle.w)
end

function paddle.draw()
    love.graphics.rectangle('fill', paddle.x, paddle.y, paddle.w, paddle.h)
end

function love.update(dt)
    paddle.update(dt)
end

function love.draw()
    paddle.draw()
end
If you run the game now, you should be able to move the paddle left and right, without it going off screen.
TODO: Add relevant screenshot
Note: You may have noticed we've used a different notation for assigning functions to our table compared to assigning variables. These two code blocks are equivilant:
function paddle.draw()
    love.graphics.rectangle('fill', paddle.x, paddle.y, paddle.w, paddle.h)
endpaddle.draw = function ()
love.graphics.rectangle('fill', paddle.x, paddle.y, paddle.w, paddle.h)
endI'll be using the former as it is the same style used for the various functions provided by LÖVE (and yes, love is a table, and load, update and draw are all keys in that table).
Now with our core update and draw functions simply calling the relevant functions on the various objects in our game. Our code will be much neater and easier to follow. It will also make exctacting objects into their own files a much more simple process.
Adding the ball
Again, this will be largely re-using the code we've used for Pong, only tidied up using a ball table. Add the following at the top of the file like we did for the paddle table:
ball = {}And in love.load:
ball.r = 5
ball.x = love.graphics.getWidth() / 2
ball.y = paddle.y - 20
ball.speedX = 200
ball.speedY = -200
Where r is the radius of the ball.
Just like with the paddle, we'll create update and draw methods for the ball:
function ball.update(dt)
    ball.x = ball.x + ball.speedX * dt
    ball.y = ball.y + ball.speedY * dt

    if ball.x < 0 then
        ball.x = 0
        ball.speedX = -ball.speedX
    end
    if ball.x > love.graphics.getWidth() then
        ball.x = love.graphics.getWidth()
        ball.speedX = -ball.speedX
    end
    if ball.y < 0 then
        ball.y = 0
        ball.speedY = -ball.speedY
    end
    if ball.y > love.graphics.getHeight() then
        ball.y = love.graphics.getHeight()
        ball.speedY = -ball.speedY
    end
end

function ball.draw()
    love.graphics.circle('fill', ball.x, ball.y, ball.r)
end
Again, this is all logic that we've used previously, so should be straightforward to understand. First of all, move the ball's position using the current x and y speeds. Then, if the centre of the ball overlaps with any of the 4 edges of the screen, we reset the ball's position so it is on that edge, and reverse either the x or y component of the speed.
All that is left to do is call these functions:
function love.update(dt)
    paddle.update(dt)
    ball.update(dt)
end

function love.draw()
    paddle.draw()
    ball.draw()
end
If you run the game now, you should see the ball bouncing around the screen, but not interacting with the paddle. Let's address that next.
Collision detection
Handling of collisions is going to be a little more tricky than previously seen in Pong. Previously we assumed that any collision between the ball and the paddle would occur on the side of the paddle facing the centre of the screen. While that may still be the case, it is not the case for the bricks we will be adding. So we will need a more general solution.
However, our collision detection code (using the AABB algorithm) that we wrote previously is still perfectly valid.
function collisionCheck(ball, other)
    return
        ball.x - ball.r / 2 < other.x + other.w and
        ball.x + ball.r / 2 > other.x and
        ball.y - ball.r / 2 < other.y + other.h and
        ball.y + ball.r / 2 > other.y
end
As a refresher, here we are checking the following 4 conditions are met:
- The left-most edge of the ball is to the left of the right-most edge of 'other'
- The right-most edge of the ball is to the right of the left-most edge of 'other'
- The top-most edge of the ball is above the bottom-most edge of 'other'
- The bottom-most edge of the ball is below the top-most edge of 'other'
In order to verify that this works, add the following to love.draw:
if collisionCheck(ball, paddle) then
    love.graphics.print('Paddle collision!', 10, 10)
end
TODO: Add relevant screenshot
Collision resolution
As mentioned, this is a little bit more tricky than in our previous tutorial. Apologies in advance for the wall of text. To make things more straightforward to understand, I have created a small LÖVE project to demonstrate the collision resolution algorithm discussed below. You can find that project here
We're going to calculate something called the Minkowski Difference to enable us to resolve our collisions.
There is an excellent article here which goes into great depth to explain what we'll be doing.
Basically, we'll be taking all of the points from 1 shape (as vectors), subtracting those from all of the points from the other shape, and then creating a shape out of all of those points. If the resulting shape overlaps the origin, then we have a collision. This makes perfect sense, as the only way in which subtracting one vector from another results in zero. If two shapes share a point in space, then they are colliding.
This algorithm will also provide us with the 'Minimum separation vector', which is simply the vector which we need to offset this Minkowski Difference shape so that it no longer overlaps the origin. We can then apply this offset vector to either of the bodies (or even split it between both if we want both bodies to move) so that they are no longer overlapping.
Again, our lives are made much easier as a result of our decision to use axis-aligned rectangles as our minumum separation vector will be a single value on either the x or y axis. This also means that we know which component of the ball's velocity we need to reverse.
For example, if the ball intersects the paddle from above, the minumum separation vector will be along the y axis. As such, we know that we need to flip the y component of the ball's velocity.
With all of that said (and hopefully, understood), let's implement it in our game. Below is an implementation which assumes that we are dealing with axis-aligned rectangles:
function getMinimumSeparationVector(rect1, rect2)
    local x1, x2 = rect1.x - rect2.x - rect2.w, rect1.x + rect1.w - rect2.x
    local y1, y2 = rect1.y - rect2.y - rect2.h, rect1.y + rect1.h - rect2.y

    local dx = (math.abs(x1) < math.abs(x2)) and x1 or x2
    local dy = (math.abs(y1) < math.abs(y2)) and y1 or y2

    if math.abs(dx) < math.abs(dy) then
        return { x = dx, y = 0 }
    else
        return { x = 0, y = dy }
    end
end
Hopefully this is (relatively) straightforward to read. The first two lines calculate the x and y values of the 4 vertices of the rectangle (that is, the top-left, top-right, bottom-right & bottom-left vertices are (x1, y1), (x2, y1), (x2, y2) & (x1, y2) respectively).
Note: Another Lua trick we're using here is declaring 2 variables in one line of code, the two code blocks below are equivilent.
local x1, x2 = rect1.x - rect2.x - rect2.w, rect1.x + rect1.w - rect2.x
local y1, y2 = rect1.y - rect2.y - rect2.h, rect1.y + rect1.h - rect2.y
local x1 = rect1.x - rect2.x - rect2.w
local x2 = rect1.x + rect1.w - rect2.x
local y1 = rect1.y - rect2.y - rect2.h
local y2 = rect1.y + rect1.h - rect2.yWe'll amend our existing collisionCheck function, so that instead of returning true or false, it will return the minumum separation vector in the event of a collision, and return nil if not. As we are only going to be calling this for collisions with the ball, lets add it to the ball table by renaming it to ball.collisionCheck.
function ball.collisionCheck(ball, other)
    local ballRect = {
        x = ball.x - ball.r,
        y = ball.y - ball.r,
        w = ball.r * 2,
        h = ball.r * 2
    }
    if
        ballRect.x < other.x + other.w and
        ballRect.x + ballRect.w > other.x and
        ballRect.y < other.y + other.h and
        ballRect.y + ballRect.h > other.y
    then
        return getMinimumSeparationVector(ballRect, other)
    else
        return nil
    end
end
The function is largely unchanged, since our getMinimumSeparationVector expects a pair of rectangles with x, y, w & h properties, we create a new rectangle based on the ball's properties.
We then do our regular AABB check, and if there is a collision, we get the minimum separation vector and return that, otherwise we return nil.
Let's finally put all of this together and have our ball properly interacting with the paddle.
Let's create a function to deal with ball/paddle collisions:
function ball.checkPaddleCollision(ball, paddle)
    local msv = ball.collisionCheck(ball, paddle)

    if msv ~= nil then
        if msv.x ~= 0 then
            ball.x = ball.x - msv.x
            ball.speedX = -ball.speedX
        end
        if msv.y ~= 0 then
            ball.y = ball.y - msv.y
            ball.speedY = -ball.speedY
        end
    end
end
As discussed previously, we simply calculate the minimum separation vector, and if it is not nil, reset the ball's position accordingly and flip the relevant component of its velocity.
Now it's simply a matter of adding this to the end of the ball.update function, and our ball is now bouncing off all sides of our paddle.
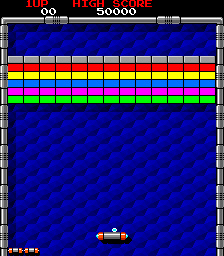
Adding bricks
Now that we've got the ball and paddle sorted, time to add the bricks! First of all we'll create a general bricks table to hold all of the properties required. As with the paddle & ball, add the following to the top of the file:
bricks = {}And in love.load (the comments are of course optional):
bricks.w = 80 -- The width of a single brick
bricks.h = 20 -- The height of a single brick
bricks.rows = 4 -- The number of rows of bricks
bricks.columns = 7 -- The number of columns of bricks
bricks.paddingX = 10 -- The horizontal gap between neighbouring bricks
bricks.paddingY = 5 -- The vertical gap between neighbouring bricks
bricks.originX = 80 -- The distance from the left edge of the screen where we will begin placing bricks
bricks.originY = 40 -- The distance from the top edge of the screen where we will begin placing bricks
bricks.levelbricks = {} -- This table will hold the actual brick objects
Now that we've got the required properties, let's begin writing the functions to create and draw our bricks. First of all, to create our bricks. We'll have a simple function to return a table representing a brick that takes an x and y parameter, and an optional width and height parameter:
function bricks.createBrick(x, y, w, h)
    local b = {}
    b.x = x
    b.y = y
    b.w = w or bricks.w
    b.h = h or bricks.h
    return b
end
In Lua, if we call this function like so bricks.createBrick(10, 10), the w & h parameters will be nil. Therefore, b.w and b.h will be set as bricks.w and bricks.h respectively.
Next, we'll use a nested loop to iterate over every column and every row to get the x and y positions for all of our bricks. Then use those values in the above function to create a table representing an individual brick at that position, then insert that into the bricks.levelBricks table.
function bricks.createBricks()
    for x = 1, bricks.columns do
        for y = 1, bricks.rows do
            local b = bricks.createBrick(bricks.originX + (bricks.w + bricks.paddingX) * (x - 1), bricks.originY + (bricks.h + bricks.paddingY) * (y - 1))
            table.insert(bricks.levelBricks, b)
        end
    end
end
Note: In Lua, numeric for loops (as opposed to generic for loops, which we'll meet soon) take 3 parameters (1 optional), in the following format:
for var = startValue, endValue, stepValue do -- If the step value is omitted, 1 is used
    -- logic
end
It is important to note that startValue and endValue are inclusive here. That is to say the following loop:
for i = 1, 3, 1 do
    print(i)
end
Will result in the following:
1
2
3
With that covered, let's move onto drawing the bricks to the screen, as well as meeting the generic for loop.
function bricks.drawbricks()
    for _, b in pairs(bricks.levelBricks) do
        love.graphics.rectangle('line', b.x, b.y, bricks.w, bricks.h)
    end
end
This will loop over every entry in the table, and return its key and value (as '\' and 'b' respectively here). We have no use for the key here (which is the entries index in the table. As we didn't explitly give it a key, this is the default behaviour), hence naming it '\'. A rectangle is then drawn to represent that brick.
If you run the game now, you should see the following:
TODO: Add screenshot
Now, onto handling collisions. This is a relatively trivial exercise as we've already done the hard work. We'll use the following function (which is largely similar to our paddle collision function):
function ball.checkBricksCollision(ball, bricks)
    for i, b in ipairs(bricks) do
        local msv = ball.collisionCheck(ball, b)

        if msv ~= nil then
            if msv.x ~= 0 then
                ball.x = ball.x - msv.x
                ball.speedX = -ball.speedX
            end
            if msv.y ~= 0 then
                ball.y = ball.y - msv.y
                ball.speedY = -ball.speedY
            end
            table.remove(bricks, i)
        end
    end
end
A few small points to note, for this loop, we are using ipairs instead of pairs, this will return the index of the entry of the table that we are looping over. As we do not give our entries a key when we insert them into this table, the key they are given is their index. Ultimately using pairs here would be fine, however it is a good idea to use ipairs to clearly state that we will require the index.
This index is used to remove the brick that we collide with. This will be changed at a later point. First of all, we will be implenting bricks of varying strength, so some bricks will require more than 1 hit. Secondly, the ball should not have to ability to modify the bricks table directly. This can make finding bugs tricky to trace if many different objects have the ability to directly modify the bricks table.
If you run your game now, your ball should destroy the bricks upon contact.
TODO: Add screenshot
To be continued